Showing posts with label Molecular Mixology Recipes. Show all posts

Sunday

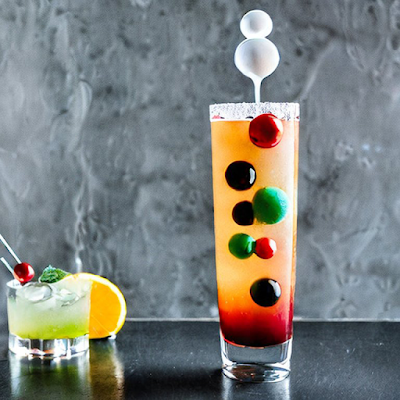
Discover the Secret to Creating Impressive Cocktails at Home using Molecular Mixology Kits


creating-cocktails-home-molecular-mixology-kits

Molecular mixology is NOT a mysterious and exclusive art, but that the secret can be unlocked with the right tools. 

Molecular mixology kits have revolutionized the way we think about cocktails. These innovative kits allow anyone to create intricate and visually stunning cocktails at home, with ease and convenience

We'll explore the many benefits of molecular mixology kits and why they are an affordable and accessible option for anyone looking to elevate their cocktail game.

To start, let's define molecular mixology. Molecular mixology is the art of using scientific techniques and tools to create unique and innovative cocktails. These techniques can include everything from spherification (a process that allows liquids to be turned into small, flavorful spheres) to foams and gels. Molecular mixology kits provide all the tools and ingredients you need to start experimenting with these techniques at home.

mojito-molecular-mixology

One of the biggest benefits of molecular mixology kits is their convenience. Gone are the days of having to hunt down specialty ingredients or tools at a local bar supply store. With a molecular mixology kit, everything you need is included, making it easy to get started right out of the box. 

Additionally, these kits often come with step-by-step instructions, so even those with little to no mixology experience can easily create impressive cocktails.

Another major advantage of molecular mixology kits is their ease of use. Many of the techniques used in molecular mixology can seem intimidating to those who are new to mixology. However, molecular mixology kits are designed to make these techniques accessible to anyone. With clear instructions and pre-measured ingredients, anyone can create stunning cocktails with minimal effort.

But perhaps the most compelling reason to try out a molecular mixology kit is their affordability. While it may seem like the cost of these kits may be steep, they are actually a very cost-effective option for those interested in exploring molecular mixology. When you consider the cost of buying all the necessary ingredients and tools separately, a molecular mixology kit is often a much more budget-friendly option.

So, what can you expect to find in a typical molecular mixology kit? Most kits will include a range of ingredients and tools, such as syringes, pipettes, and spoons, as well as more specialized items like calcium lactate and sodium alginate. These ingredients are used to create the various gels, foams, and spheres that are a hallmark of molecular mixology.

gin-and-tonic-molecular-mixology

But don't just take our word for it - try out a molecular mixology kit for yourself and see the amazing cocktails you can create. IMAGINE impressing your friends at your next dinner party with a perfectly spherified cocktail or a foam-topped drink. With a molecular mixology kit, the possibilities are endless.

Just remember, molecular mixology kits offer a convenient, easy, and affordable way for anyone to create impressive cocktails at home. With all the necessary tools and ingredients included, and step-by-step instructions, even those with little mixology experience can create stunning cocktails with minimal effort

So why wait? Learn something new and exciting. Start experimenting with molecular mixology today and elevate your cocktail game to the next level. 

Create professional-quality drinks in the comfort of one's own home. Tap on the link below and try one of the molecular mixology kits we tried at home, reviewed and highly recommend, 4 Best Molecular Mixology Kit to Make Cocktails that Will IMPRESS a Girl

molecular-mixology-kit

Saturday

What is the Spherification Process?


What is spherification?

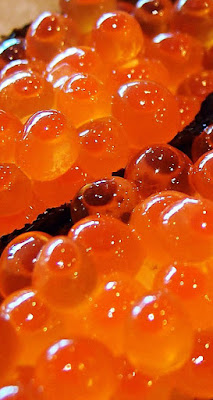
Spherification is a culinary technique in which a liquid is turned into a soft, bite-sized sphere that has a gelled outer layer and a liquid interior. It is often used to create small, "pearls" or "caviar" out of fruit juices, cocktails, and other flavored liquids.

what-is-spherification

The procedure of spherification involves mixing a liquid with a gelling agent, such as sodium alginate, and then dripping the mixture into a bath of calcium chloride. The calcium ions in the calcium chloride react with the alginate to form a thin, gelled membrane around the droplets of liquid. 

The resulting spheres can be eaten as is or used as a garnish or ingredient in a variety of dishes.

Examples of dishes that can be made using the spherification technique include "caviar" made from fruit juices, special cocktails transformed into bite-sized spheres, and soups served with gelled droplets of broth. The possibilities for using spherification in the kitchen are endless, and the technique continues to be a popular and innovative way for chefs to add visual and textural interest to their dishes.


What do you need for spherification? 

Here are the main ingredients and equipment you will need to perform spherification:

Ingredients:

A liquid to be gelled (such as fruit juice, cocktail, soup, or puree)

Sodium alginate (a gelling agent derived from brown seaweed)

Calcium chloride (a compound salt that helps the gelling process)

food-grade-calcium-chloride

Equipment needed for spherification:

A blender or immersion blender (to mix the sodium alginate into the liquid)

A spoon or squeeze bottle (to drip the mixture into the calcium chloride bath)

A large bowl or container (to hold the calcium chloride bath)

A slotted spoon or small strainer (to remove the gelled spheres from the bath)

You may also want to have some additional equipment on hand, such as a kitchen scale to measure out precise amounts of ingredients, and a thermometer to ensure that the liquid is at the right temperature for the gelling process.


What is the spherification process? 

The process of spherification involves mixing a liquid with a gelling agent.

The science behind spherification relies on the properties of gelling agents, specifically hydrocolloids, which are molecules that can form gels when mixed with water. There are several different types of hydrocolloids, each with its own unique properties and applications in the culinary world.

Sodium alginate is a type of hydrocolloid that is derived from brown seaweed and is commonly used in the spherification process.

Spherification Process- To start the spherification process, the liquid to be gelled is mixed with a small amount of sodium alginate using a blender or immersion blender. The mixture is then allowed to rest for a period of time, typically several hours to overnight, to allow the alginate to fully dissolve and hydrate. 

This resting period is known as "hydration," and it is important to allow sufficient time for the alginate to fully hydrate to ensure that it will gel properly.

Once the mixture has hydrated, it is ready to be used in the spherification process. The mixture is typically poured into a squeeze bottle or spooned into a small strainer, and then dripped into a bath of calcium chloride. 

The calcium ions in the calcium chloride react with the alginate to form a thin, gelled membrane around the droplets of liquid. The gelled spheres can then be removed from the bath using a slotted spoon or small strainer and placed in a bowl of water to rinse off any excess calcium chloride.

There are two main methods of spherification: direct spherification and reverse spherification, depending on where you put the gelling ingredient.


What is the difference between direct spherification and reverse spherification?

A) DIRECT SPHERIFICATION is a technique used to create spheres or bubbles of liquid that have a thin, semi-solid shell and a liquid interior. The liquid is mixed with a small amount of sodium alginate, which is a gelling agent derived from algae. 

In direct spherification, alginate is added directly to a flavored liquid. This solution is then added drop by drop to a setting bath that contains calcium. As the calcium ions interact with the alginate, a flexible skin forms around the drop.

When the mixture is dropped into a bath of calcium chloride, the sodium alginate reacts with the calcium ions to form a gel-like membrane around the droplets of liquid. This creates the sphere or bubble shape.


B) REVERSE SPHERIFICATION, on the other hand, is a technique used to create a gel-like substance with a liquid center. To do this, the liquid that you want to turn into a gel is mixed with calcium chloride and then dropped into a bath of sodium alginate. 

Instead of adding the calcium to the water bath, you instead add it to the flavored liquid which will gel in a sodium alginate bath.

The calcium ions in the liquid react with the sodium alginate to form a gel-like membrane around the droplets of liquid, creating a gel with a liquid center.

Direct spherification is typically used to create spheres or bubbles that are meant to be eaten as is, while reverse spherification is used to create a gel-like substance that can be used as a component in a dish or drink.

With reverse spherification, it's possible to make much larger spheres. The liquid center itself doesn't contain anything that will gel, so the sphere can never become entirely solid.

Reverse spherification is the most common method of spherification and is generally considered to be the more stable and reliable of the two methods. 

It is also the method that is most commonly used in professional kitchens.


Related Post: 10 Best Molecular Gastronomy Kits 2023 that Will Help You Cook Easily Like a PRO


What do I need for reverse spherification?

To produce Reverse Spherification, you need a bath solution with 0.5% sodium alginate (0.5 g per 100 g of flavored liquid). Sodium Alginate, like most hydrocolloids, needs to be dispersed in the liquid and hydrated before it can gel in presence of calcium ions.


What is the process of reverse spherification?

The process of reverse spherification involves the following steps:

It is similar to traditional spherification, but the order of the steps is reversed.

1) Create a sodium alginate bath by mixing a sodium alginate solution with a calcium lactate solution. Allow the mixture to rest for several hours to overnight to allow the alginate to fully hydrate.

The amount of calcium chloride needed will depend on the size of the container and the desired concentration of the solution.

2) Place the liquid or puree that you want to turn into a sphere into a squeeze bottle or a pipette.

3) Slowly drip the liquid or puree into the sodium alginate bath, allowing it to form into a sphere. The gelled spheres will begin to form as soon as the mixture comes into contact with the calcium chloride.

4) Allow the spheres to sit in the bath for a few minutes to set.

5) Carefully remove the spheres from the bath and rinse them in cold water to remove any excess sodium alginate solution.

Once the gelled spheres have been rinsed, they can be transferred to a container of water or a liquid of your choice. The spheres will continue to gel and firm up over the next several hours.

6) Serve the spheres immediately, or store them in a container filled with a liquid (such as water or a flavored liquid) until ready to serve.

what-is-the-process-of-reverse-spherification

The gelled spheres can be served as is, or they can be used as a garnish or ingredient in a variety of dishes.

Reverse spherification can be used to create a variety of creative and visually appealing dishes, such as "caviar" made from fruit purees or cocktails served in a sphere form.


How long does reverse spherification last?

The liquid center itself doesn't contain anything that will gel, so the sphere can never become entirely solid. Thus, spheres prepared by reverse spherification can be can be kept indefinitely.


You can try this easy molecular gastronomy recipe at home, Yogurt Spheres Recipe by Reverse Spherification- Molecular Gastronomy Recipe


What is the process of direct spherification? 

Direct spherification is a slightly different process, and it involves the following steps:

1) Begin by preparing your flavored liquid and gelling agent. The gelling agent you choose will depend on the type of liquid you are using and the desired texture of the final product. Sodium alginate is a common choice for direct spherification, as it reacts well with calcium to create a firm, caviar-like texture.

2) Mix the gelling agent into the flavored liquid according to the manufacturer's instructions. It is important to fully dissolve the gelling agent in the liquid to ensure an even texture.

3) Fill a large bowl or container with a calcium chloride solution and place it on a flat surface. The solution should be deep enough to fully submerge the spheres or pearls that you will be creating.

4) Using a dropper or syringe, carefully drip the flavored liquid mixture into the calcium chloride solution. The droplets will begin to gel and form a skin around the outside as they come into contact with the calcium.

5) Allow the spheres or pearls to sit in the calcium chloride solution for a few minutes to fully gel. The exact amount of time will depend on the size and type of spheres you are creating, as well as the concentration of the gelling agent and calcium solution.

6) Once the spheres are fully gelled, carefully remove them from the calcium chloride solution using a slotted spoon or a mesh strainer. Rinse the spheres in cold water to remove excess calcium and gelling agent.

The spheres will continue to gel and firm up over the next several hours.

7) Serve the spheres as is or use them in a variety of dishes to add visual and textural interest. You can also store the spheres in an airtight container in the refrigerator until ready to use.

what-is-the-process-of-direct-spherification

Keep in mind that the exact process may vary depending on the specific ingredients and equipment you are using. It may take some trial and error to achieve the desired results, but the spherification process can be a fun and creative way to add interest to your dishes.


REFERENCES:

Jose Sanchez. Molecular Gastronomy: Scientific Cuisine Demystified, 1st Edition. 2015. Wiley. ISBN-10:111807386X. ISBN-13:978-1118073865

Michael Brenner, Pia Sörensen and David Weitz. Science and Cooking: Physics Meets Food, From Homemade to Haute Cuisine (Illustrated edition). 2020. W. W. Norton & Company. ISBN-10:0393634922. ISBN-13:978-0393634921

How is Molecular Gastronomy Done at Home? Use the Best Molecular Gastronomy Kits 2023


How-is-Molecular-Gastronomy-Done-at-Home

What are molecular gastronomy kits? 


Molecular gastronomy is a scientific discipline that studies the physical and chemical processes that take place during cooking and eating. It is a relatively new field of study that combines traditional culinary techniques with the principles of physics, chemistry, and biology to explore the molecular basis of food and flavor.

“Molecular gastronomy kits” are sets of tools and ingredients that are used to create culinary dishes that involve scientific techniques and principles. These kits are often used by chefs and food enthusiasts at home who are interested in exploring new and innovative ways to prepare and present food.

Molecular gastronomy kits are not just for professional chefs; they are also popular with home cooks who are interested in exploring the principles of molecular gastronomy in their own kitchens. 

Many kits are designed to be user-friendly and easy to use, with step-by-step instructions and clear explanations of the scientific principles behind each recipe. Some kits even include video tutorials or online resources to help home cooks get started with molecular gastronomy.

One of the main goals of molecular gastronomy is to understand how different physical and chemical processes can be used to alter the texture, flavor, and appearance of food. This can involve the use of specialized ingredients, such as gelling agents and flavor enhancers, as well as the application of various cooking techniques, such as sous vide and spherification. 

Molecular gastronomy kits usually include a selection of ingredients, along with easy deatailed directions on how to use them to create different types of dishes. These ingredients are often used in small quantities to create dramatic effects.


Related Post: 10 Best Molecular Gastronomy Kits 2023 that Will Help You Cook Easily Like a PRO


These food kits are designed to help chefs and home cooks experiment with the principles of molecular gastronomy and create dishes that are visually appealing, texturally interesting, and taste delicious.


Molecule-R–Molecular-Gastronomy-Starter-Kit
Some common ingredients that may be included in a molecular gastronomy kit include:

- Gelling agents: These are substances that are used to create gels or jellies from liquids. Gelling agents are often used in molecular gastronomy to create unique textures and shapes for dishes. Examples include agar agar, carrageenan, and xanthan gum.

- Flavor enhancers: These are ingredients that are used to intensify the flavor of a dish. Flavor enhancers can be used to create complex, multi-layered flavors, or to amplify the natural flavors of a particular ingredient. Examples include umami powders and citric acid.

- Foaming agents: These are ingredients that are used to create foams or mousses from liquids. Foaming agents are often used to create airy, light textures in dishes, and can be made from a variety of ingredients, such as soy lecithin and iota carrageenan.


In addition to these ingredients, molecular gastronomy kits may also include a range of specialized tools and equipment. Some common tools that may be included in a kit include:

- Spherification tools: These are tools that are used to create spherical shapes from liquid ingredients. Spherification is a technique that involves mixing a liquid with a gelling agent and then dropping it into a bath of calcium chloride or sodium alginate, which causes the liquid to form into a sphere. 

You can try this easy molecular gastronomy recipe at home, Yogurt Spheres Recipe by Reverse Spherification- Molecular Gastronomy Recipe

- Syringes and pipettes: These are tools that are used to dispense small amounts of liquid accurately. In molecular gastronomy, syringes and pipettes are often used to create precise droplets or shapes from liquid ingredients.

- Immersion circulators: These are devices that are used to cook food in a water bath at a precise temperature. Immersion circulators are often used in molecular gastronomy to cook food using the sous vide technique, which involves sealing food in a plastic bag and cooking it in a water bath at a precise temperature for an extended period of time.


Some examples of molecular gastronomy dishes that can be created at home using molecular gastronomy techniques include:

- Spherical ravioli: This is a dish that involves creating small spheres of pasta or dough that are filled with a flavorful filling, such as cheese or vegetables. The spheres are typically created using the spherification technique, and can be served in a variety of sauces or broths.


spherical-ravioli-molecular-gastronomy-food

- Foaming cocktails: This is a drink that involves creating a foam or mousse from a liquid ingredient, such as fruit juice or liqueur. The foam can be flavored with a variety of ingredients, and is often served as a topping for cocktails or other drinks.

- Sous vide-cooked meats: This is a dish that involves cooking meat using the sous vide technique. The meat is typically sealed in a plastic bag and cooked in a water bath at continue a precise temperature for an extended period of time, resulting in a tender and perfectly cooked piece of meat.


While molecular gastronomy can be a fun and interesting way to explore the world of food and cooking, it is important to note that it is not without its detractors. Some people argue that molecular gastronomy is too focused on appearance and novelty, and that it can lead to dishes that are over-engineered and deficient in flavor. Others argue that the use of modernist ingredients and techniques can be wasteful.

However, proponents of molecular gastronomy argue that it allows chefs and home cooks to create new and innovative dishes that can challenge the boundaries of traditional culinary techniques and inspire people to think about food in new and creative ways.

In general, molecular gastronomy kits are a great resource for chefs and food enthusiasts who are interested in exploring the scientific side of cooking and creating unique and innovative dishes. These kits provide the tools and ingredients necessary to experiment with different techniques and flavors, and can help to inspire new and creative ideas in the kitchen.

While molecular gastronomy has its critics, it remains a popular and interesting way for chefs and home cooks to explore the world of food and cooking, and to create new and innovative dishes that challenge traditional culinary techniques. 

Whether you are a professional chef looking to push the boundaries of your culinary skills, or a home cook who is interested in trying something new and different in the kitchen, a molecular gastronomy kit can be a fun and educational way to get started with this exciting discipline.

4 Best Molecular Mixology Kit to Make Cocktails that Will IMPRESS a Girl


best-molecular-mixology-kit
Creative by: GerDukes

What is a Molecular Mixology Kit?


Have you ever thought about creating Bloody Mary’s that look like tomatoes? Make spherified sake bombs instead.  Try molecular mixology and impress your friends or delight a special date. It is so lit. 😉

Molecular mixology kit is a collection of tools needed to apply modernist cuisine techniques to mixing cocktail drinks. The techniques include spherification, gelification, emulsification and suspension.

Molecular mixology kit bring your bartending creativity to the next level and shook anyone with spectacular cocktail such as tasty caviar beads that burst in the mouth or encapsulate cocktails into bubbles that burst in your mouth.

Molecular mixology equipment ranges from simple blowtorches to sous vide machines, immersion blender, rotary evaporators, vacuum chambers, cotton candy makers, liquid nitrogen, dehydrators and ISI Whips.


These are the 4 best molecular mixology kits reviews:


4) Rose Copper Cocktail Shaker Set Bartender Kit by BARILLIO
WITH 24 oz Stainless Steel Martini Mixer, Muddler, Mixing Spoon, jigger, 2 liquor pourers, Velvet Bag Recipes Booklet and eBook

This is not a molecular mixology cocktail kit but if you do not have a bartender kit, you should consider having one.

This is a great brand.

rose-copper-cocktail-shaker-set-bartender-kit-by-BARILLIO
Rose Copper Cocktail Shaker Set Bartender Kit

BARILLIO complete bartender kit is a top-grade bar tools you need for effortlessly mixing delicious cocktails and mocktails without any mess.

Whether you are an amateur or experienced mixologist, this cocktail set is perfect for you.

TOP RUSTPROOF STAINLESS STEEL: This bartender kit copper finished product undergoes rigorous inspection in the USA.

Barillio Martini Shaker features a high-grade inner, which does not leech harmful chemicals nor affect your beverages’ flavors. Unlike similar cheap products that rust easily.

This rose gold cocktail set is made of the highest quality stainless steel grade SS304 and SS430.

By hand washing this with warm, soapy water - and the stunning electro rose finish will last for years to come.


3) Molecular Mixology Introductory Kit with Ingredients, Tools and Recipe Booklet

All-in-one kit and cocktail recipes. You can really mix cocktails to impress a girl.

Enjoy a molecular refreshing mojito bubbles, martini bites, Bloody Mary or gin & tonic. Imagine suspensions of coffee liqueur frappe, airs of margarita or Electric jello shot. Recreate the cocktails of the coolest clubs in the city.

molecular-mixology-introductory-kit-ingredients-tools-recipe-booklet

Learn how to effortlessly turn many classic cocktails into a modernist cocktail drinks with sugar foam, caviar bubbles, or by transforming your favorite drink into bubbles.

Deconstruct your favorite cocktails. Learn spherification, gelification, emulsification and suspension. Making modernist cocktail drinks is really a lot simpler than you would have expected.

The beginner molecular mixology kit included a booklet and DVD full with information and easy recipes to help you have emulsifying and spherifying liquids in half the time.

Related Modernist Recipe: Yogurt Spheres Recipe by Reverse Spherification- Molecular Gastronomy Recipe


2) Molecular Mojito Kit with complimentary Culinary Syringe

There are cheaper ways to get Mojitos if you are stingy, but the fun you get from this molecular mojito kit makes it perfect for a date-night.

I would recommend as a way to say, “I'd like to spend some time with you, TBH”.

molecular-mojito-kit-complimentary-culinary-syringe
Deconstructed Mojito

Buy this molecular mojito kit. Learn how to make mojito bubbles. Encapsulate your mojito into a large sphere that will burst in your mouth. Get some savory mojito foam with your steak that will have everyone in awe.

The molecular mixology technique used for this cocktail recipe was spherification, which is preferred to create small balls or caviar.

Read the directions before you start. You will need distilled water (no calcium or chlorine in the water).

High quality tools, easy to follow recipe directions, and clearly labeled ingredients. Everything you need to get your reverse spherification cocktails after dinner.


Related Kits: 10 Best Molecular Gastronomy Kit that Will Help You Cook Easily Like a PRO


1) Gin and Tonic Molecular Mixology Kit with Culinary Syringe included without charge

This cocktail kit is amazing. A great product, super fun and easy to use.

The technique used for this molecular mixology cocktail is gelification to create the pearls.

gin-and-tonic-molecular-mixology-kit-with-culinary-syringe
Ready to burst gin & tonic bubbles

This is a beginner all-in-one kit. The mixology kit has clear recipe book instructions and many online tutorial videos to help you make the best cocktail drinks at home.

Learn how to easily use molecular mixology tools and concoct a classic gin and tonic (or virgin) cocktail into a modernist cocktail with suspended pearls of tonic, sugar foam, caviar bubbles, or by totally turning it into a gin and tonic bubble.

There is even a bark of cinchona included in the kit to make your own high-quality tonic water.

Related Tonic Recipe: How to Make Delicious Homemade Tonic Syrup That Will Pass the Taste Test- Sous Vide Cocktail Recipes


Learn more; tap here NOW… Culinary Physics: 10 BEST Books to Understand the Physics and Chemistry of Cooking


Watch Related Youtube Video: Molecular Mixology Kit - What can you make, molecular gastronomy kit cocktails


Thursday

How to Make Delicious Homemade Tonic Syrup That Will Pass the Taste Test- Sous Vide Cocktail Recipes


What is Tonic Syrup?

Tonic syrup gained its name from the effects of its bitter flavoring. Tonic syrup (without soda or carbonated water) can be a blend of many different things, depending on the preferred recipe. Bitterness is used to balance other flavors, such as sweetness or the taste of gin. On the other hand, tonic water originally contained only carbonated water (soda water) and a large amount of quinine. Tonic water usually now has a significantly lower quinine content.


Quinine powder was so bitter that British officials stationed in India and other tropical British posts, began mixing the powder with soda and sugar. They did this to neutralize the ingredient's aggressively bitter flavor, some avid drinkers added sugar and carbonated water—hence tonic water was born. At that time, cinchona bark and quinine powder is used as herbal treatment and prevention of malaria.


In the early year 1800s, the Gin and Tonic was created. The mixed drink gin and tonic originated in British colonial India. Since the most common liquor imbibed by the British at the time was gin


Did you know? The first commercial tonic water was produced in year 1858. 


Modern day or avant-garde mixologists have recently started turning to bottled tonic syrups or homemade tonic syrups, which they mix with gin and sparkling water to build a new-age gin and tonic. Professional mixologists prefer tonic syrups because concentrated syrups make it much easier to control the sweetness in cocktail mixes.


make-homemade-tonic-syrup-sous-vide-cocktail-recipes

High quality ingredients like the bark of the cinchona tree give it an authentic rust color and a distinctive flavor to the tonic syrup that is sure to impress your friends and your discerning taste. Although the idea of making your own tonic syrup might seem overly ambitious and needed extra effort, if you’re willing to go all out for the best Gin and Tonic of your happy life, this homemade concoction will blow commercially prepared versions (think Canada Dry, Schweppes, Jack Rudy Cocktail Co.- Small Batch Tonic Syrup and others) out of the water. 


The difficult part of this recipe is buying best quality cinchona bark, which is what makes tonic, a tonic. Although it is not a readily available ingredient, it can be found in specialty stores or can be ordered fast and easily online at Amazon.com, click it here... organic cinchona bark


It is also available at Kalustyan’s, Address: 123 Lexington Avenue New York, NY 10016 USA; Phone: 1-800-352-3451 (only in the US) or +1 212 685 3451; Fax: 1-212-683-8458; E-mail: orderonline@kalustyans.com; Schedule: Monday - Saturday 10 am - 8 pm EST Sunday and Holidays 11 am - 7 pm EST


MAKES 1- 1/2 cups

SOUS VIDE COOKING TIME: 1 hour (or up to 2 hours) 
ACTIVE PREP TIME: 10 minutes, plus at least 30 minutes to cool

INGREDIENTS:


2 cups sugar

2 cups water
1/2 cup (2 ounces) cinchona bark
Zest of 1 grapefruit, removed in strips with a vegetable peeler, including some of the bitter white pith
1 tablespoon dried lavender (optional)
1 teaspoon citric acid powder, or 1/4 cup fresh lemon juice


PREPARATION PROCEDURE:


1) Preheat your sous vide water (using Sous Vide Immersion Circulator) bath to 60°C (140°F).


2) Place all of the ingredients in a freezer-safe gallon-size Ziploc bag and seal using the water displacement or table-edge method (please refer to the procedure below). I recommend the latter method for recipes with a relatively large amount of liquid.


3) When the water reaches the target temperature, lower the bag into the water bath and cook for 1 hour.


4) Remove the bag from the water bath and chill in an ice water bath (please refer to the procedure below) for 30 minutes, in the freezer for 1 hour, or in the refrigerator for 2 hours.


5) Strain the liquid through a fine-mesh sieve into a bottle or mason jar to remove the spices. The syrup can be refrigerated for up to 2 weeks or frozen for up to 2 months.


VACUUM SEALER NOT REQUIRED:

HOW TO SEAL USING THE WATER DISPLACEMENT OR TABLE-EDGE METHOD

1) Water Displacement Method. To achieve a proper seal and get most of the air out of a bag without using an expensive vacuum sealer, I recommend the water displacement method (aka Archimedes’ principle). Place the food (including any marinade or sauce) in a freezer-safe double-sealed Ziploc bag. 


Submerge the open bag into the water with only the seal exposed. Everything below the zippered closing should be covered with water. The barometric pressure of the water will force most of the air out of the bag. When the liquid rises to just below the zipper, seal the bag. You should feel and hear the “click-click-click” as it closes. It is like sous vide music to the ears, assuring you that no water will get into the ingredients. When placing a lot of small items in a bag, strive to arrange all of the pieces in a single layer, without overlapping. This ensures that the pieces will cook through evenly. Once the bag is sealed, run your hand over the pouch again to distribute the contents uniformly before placing the bag in the water bath.


2) Table-Edge Method. Sealing bags that contain liquid, such as soups, syrups, or alcohol infusions, can be awkward, but here is a hassle-free solution that I call the table-edge method (very scientific sounding, I know). Pour the ingredients into a freezer-safe, double-sealed Ziploc bag and partially close the seal. Hold the bag against a table (or counter), with the liquid hanging down and the top of the bag (with the zippered closing) on top of the table. Use the edge of the table to push down on the liquid and then push out any remaining air from the top of the bag before sealing closed.


HOW TO CHILL PROPERLY: THE ICE WATER BATH METHOD


Minimizing the time window for bacterial growth is the key to safe sous vide cooking. For that reason, if you are going to refrigerate food cooked sous vide (rather than eating it immediately), I recommend first rapidly chilling the bag in an ice water bath. When I talk about using an ice water bath to chill food, I do not mean a few ice cubes floating in a bowl. To cool food down efficiently, you want the coldest water possible, which means adding enough ice to bring the water all the way to 32°F. The addition of salt will lower the freezing point of water, making an even colder bath possible. This same principle also enables you to churn ice cream without a machine. The following instructions will produce an ice water bath ideal for chilling your sous vide foods, but do not feel obliged to follow it slavishly. Think of the ratio as a rough guide.

1) To make a proper ice water bath, fill a large bowl with ice cubes and add cold tap water equal to about half the volume of ice. 


2) Next, add kosher salt equal to about one-fourth the volume of water and then stir until the mixture is very cold (it will be about 28°F within about 30 seconds. The ratio is 1 part salt, 4 parts water, and 8 parts ice, so for a 4-quart bowl filled with ice, add 8 cups cold tap water and 2 cups kosher salt.


If you are already into sous vide cooking for a long time or just an enthusiastic beginner, you might want to download this. It is quite handy. Get it now… Accurate Sous Vide Cooking Times- PDF Free Download


How to Use Tonic Syrup You Made


In a highball glass over ice, combine 3/4 oz tonic syrup with 1- 1/2 oz vodka or gin. 
Top with 3 oz seltzer.


What is Cinchona Bark?


Cinchona or Peruvian Bark. Cinchona is best known as the source of quinine, which for centuries was the most widely taken antimalarial remedy in the world. A Jesuit missionary first documented it in Peru in year 1633. Bark of the trunk, branches, and root contains alkaloids, especially quinine. The bark of the trunk is most commonly used medicinally. Various Cinchona species are used medicinally, including C. calisaya, C. ledgeriana, and C. officinalis.


Key Actions:


1) Bitter

2) Antibacterial
3) Tonic
4) Reduces fever
5) Stimulates the appetite
6) Astringent
7) Antimalarial
8) Antispasmodic

Traditional Medicinal Uses and Current Uses of Cinchona


As a medicinal herb, cinchona bark is also known as Jesuit's bark or Peruvian bark. The bark is stripped from the tree, dried, and powdered for medicinal uses. The bark is medicinally active, containing a variety of alkaloids including the antimalarial compound quinine and the antiarrhythmic quinidine.


1) Digestive Stimulant. As a bitter tonic, cinchona stimulates saliva, digestive secretions, and appetite, and improves weak digestive function.


2) Gargle. Cinchona is useful as a gargle for sore, infected throats.


3) Muscle Spasms. The herb is used in herbal medicine for cramps, especially night cramps. It also relieves arthritis.


4) Indian Remedy. In India, cinchona is used for various conditions, including sciatica, dysentery, and problems with kapha.


5) Antimalarial. Cinchona, and in particular quinine, were the principal remedies for malaria until the First World War. From the 1960s, resistance of the malarial parasite to the synthetic drug chloroquine led to quinine’s use once again in preventing and treating malaria. Quinine is also used to treat other acute feverish conditions.


6) Traditional Remedy. The indigenous peoples of Peru have taken cinchona for many centuries, and it is still a well-used remedy for fevers, digestive problems, and infections.


7) Homeopathic Proving. Samuel Hahnemann, the founder of homeopathy, prepared the first homeopathic medicine, or proving, from cinchona in about 1790.


References:


Andrew Chevallier. 2016. Encyclopedia of Herbal Medicine, 3rd Edition.  DK Publishing. ISBN-13: 978-1465449818


Jeffrey Morgenthaler (Author), Alanna Hale (Photographer), Martha Holmberg. 2014. The Bar Book: Elements of Cocktail Technique. Chronicle Books. ISBN-13: 978-1452113845


Lisa Q. Fetterman. 2016. Sous Vide at Home: The Modern Technique for Perfectly Cooked Meals. Ten Speed Press. ISBN-13: 978-0399578069


Watch Related Cocktail Video: Tonic (Quinine) Syrup from the Cocktail Dudes

Disclosure | Disclaimer |Comments Policy |Terms of Use | Privacy Policy| Blog Sitemap


The information contained herein is provided as a public service with the understanding that this site makes no warranties, either expressed or implied, concerning the accuracy, completeness, reliability, or suitability of the information. Nor does warrant that the use of this information is free of any claims of copyright infringement. This site do not endorse any commercial providers or their products.


Culinary Physics Blog: Exceptional food that worth a special journey. Distinctive dishes are precisely prepared, using fresh ingredients. And all other foods that can kill you. Culinary Physics is a Molecular Gastronomy blog specializing in molecular gastronomy recipes-food style, molecular book review, molecular gastronomy kit review and molecular gastronomy restaurants guide.


Culinary Physics Blog is your comprehensive source of Australian cuisine recipes, Austrian cuisine recipes, Brazilian cuisine recipes, Caribbean cuisine recipes, Chinese cuisine recipes, Cuban cuisine recipes, East African cuisine recipes, English cuisine recipes, French cuisine recipes, German cuisine recipes, Greek cuisine recipes, Hungarian cuisine recipes, Indian cuisine recipes, Indonesian cuisine recipes, Israeli cuisine recipes, Italian cuisine recipes, Japanese cuisine recipes, Korean cuisine recipes, Lebanese cuisine recipes, Mexican cuisine recipes, North African cuisine recipes, Norwegian cuisine recipes, Philippine cuisine recipes, Polish cuisine recipes, Russian cuisine recipes, South American cuisine recipes, Spanish cuisine recipes, Thai cuisine recipes, Turkish cuisine recipes, Vietnamese cuisine recipes and West African cuisine recipes.


2011- 2022 All Rights Reserved. Culinary Physics Blog

http://culinaryphysics.blogspot.com