Friday

How to Prepare Kale Chips Easily? Best Kale Chips Recipes


Kale Chips Nutrition

Kale Benefits. Kale is a superb source of such antioxidant vitamin K, vitamin C, and vitamin A. An excellent source of fiber, lutein and beta-carotene. It is also high in cancer-preventing glucosinolates and low in calories, at only about 35 per cup.


What does Kale Taste Like?

Kale leaves have a unique earthy taste, a minerality tang, and a hearty chew. The flavor can be bold, yet it retains a detectable sweetness. The green is not peppery or pungent like some of its brassica cousins, though older leaves or those from plants grown in warmer weather often take on a hint of bitterness. Kale accommodates well to many cooking methods, including sautéing, steaming, roasting, or simmering in soups, stews, baked and fried. It can also be served raw.


What are the Healthiest Type of Kale?

healthiest-type-of-kale

Most grocery stores carry at least one of these kale varieties.

There are so many types of kale. However, the three most ubiquitous are curly kale, lacinato kale (aka dinosaur kale, black kale, Tuscan kale, or cavolo nero), and red Russian kale. The most common type of kale purchased from the market is curly kale.

Curly kale: Bulky, fluffy bright green leaves with lighter green or whitish stems and thick center ribs.

Lacinato kale or Tuscan kale (also known as Lacinato, dinosaur, cavolo nero, black, or Italian): Elongated, flat but wrinkled leaves, ranging in color from a dark, rich mineral green to nearly black. Ribs and stems are lighter green.

Red Russian kale: Broad, serrated dark green leaves with purple-tinged edges. The leaves can be flat or curly, with purplish pink stems and ribs.


Are Kale Chips Really Good for You?

One cup of chopped kale contains just 34 calories, and 1 tablespoon of olive oil contains 119 calories for a total of 153 calories in a homemade batch. Many unhealthy snack foods like cookies, donuts or potato chips can contain more than 300 calories in a typical serving.


Best Kale Chips Recipe

Kale chips have become a bit of a phenomenon in the last few years but, in all honesty, the prices that many manufacturers charge are beyond a joke – for a bit of dried-up kale! They are super easy and very cheap to make yourself.

best-kale-chips-recipes

Serves: 2 persons

INGREDIENTS:

500g (1lb 2oz) curly kale
olive oil, for drizzling
sea salt


COOKING DIRECTIONS:

1) Preheat the oven to 140°C/275°F/Gas mark 1.

2) Pick out and discard any of the thicker, woodier stems from the kale. If you want to cut kale into smaller pieces, tear or rip them with your hands. Do not use knife to chop into smaller pieces.

3) Drizzle the leaves with olive oil and sprinkle over as much sea salt as you fancy, then toss well to ensure even coverage. Lay the kale in a single layer over several baking sheets (or cook them in batches).

4) Bake in the oven for around 25 minutes until nice and crispy, keeping an eye on them to make sure they do not burn. Allow to cool completely before storing in an airtight container.


Related Healthy Recipe: How to Make Ultimate Indian Veggie Burger - Vegetarian Recipes


KALE STORING TIPS

How to Store Kale Chips?

How do you keep kale chips crispy? Put dry uncooked rice or desiccant packets into the bottom of your airtight storage container then put the kale chips loosely on top. The rice works as a drying agent, absorbing any excess moisture and keeping your kale chips crispy.


How Long Can You Store Kale Chips?

I dehydrated my kale chips then stored them in a Ziploc bags or mason jar sealed with a vacuum sealer. They stayed good for the one week and still tasted fresh.


Do You Store Kale Chips in the Fridge?

You can store them in the fridge using clean paper bags. If your kale chips lose their crunch, re-crisp them by spreading them out on a baking sheet again and baking at 300 F/149 C for just 5 - 7 minutes.


How Do You Keep Kale Fresh?

You want to store fresh kale in the refrigerator but in the coldest part of the fridge. Kale tends to get more and bitterer the longer it is left at room temperature, so keep it cool. I tightly wrap my kale in a paper towel and then place it in an airtight bag.


Do you want to know more? Learn how… Complete Guide to Storing Fruits and Vegetables at Home


Where to Buy Best Kale Chips Safe and Secure?

No time to cook homemade kale chips! Do you want convenience and portability?

Treat yourself to a crispy kale chips packed with the nutritional power of superfood kale. Buy kale chips of the highest quality - and get them delivered FAST from Amazon.com straight to you anywhere! Have fun browsing a huge range of natural and organic kale chips. Air-crisp organic kale that has been tossed in on handcrafted dressings. Try it once, learn more, just click here now, Rhythm Superfoods Kale Chips.


References:


Dale Pinnock. 2017. The Medicinal Chef: How to Cook Healthily: Simple Techniques and Everyday Recipes for a Healthy, Happy Life. Quadrille Publishing Ltd. ISBN-13: 978-1849499538

Laura B. Russell. 2014. Brassicas: Cooking the World's Healthiest Vegetables: Kale, Cauliflower, Broccoli, Brussels Sprouts and More. Ten Speed Press. ISBN-10: 1607745712

Thursday

How Do You Cook Chicken Livers? Easy Chicken Liver Pate With Cream Recipe


easy-chicken-liver-pate-with-cream-recipe


While chicken is one of the most commonly eaten meats, the chicken liver is often overlooked as an unwanted part of the bird. Chicken liver does contain amount of cholesterol, but food does contain very high levels of several different important vitamins and minerals. Look beyond the traditional chicken liver for new cooking methods that might just motivate you to try this meat.

Try making chicken liver pate with cream. Pâté is a mixture of cooked ground meat and fat minced into a spreadable paste. Common additions include vegetables, herbs, spices, and either wine or brandy (often cognac, Armagnac or Madeira). "Chicken liver pate with cream" can be served either hot or cold, but it is considered to develop its fullest flavor after a few days of chilling.


Easy Chicken Liver Pâté (Pâté de Foie) With Cream Recipe


This pâté is very rich and we find that a little goes a long way. This makes enough for four people as a starter, or as part of a light lunch.


INGREDIENTS:

200g chicken livers
200g unsalted butter (room temperature)
1 clove of garlic, very finely chopped
1 shallot, very finely chopped
30ml brandy or Madeira
dash of Dijon mustard
ground allspice
salt and freshly ground black pepper


COOKING DIRECTIONS:

1) Clarify 100g of the butter – simply heat it gently, skimming off any solids that rise to the surface; when all the solids are gone from the top, let the butter settle for 2 minutes and pour off the golden clarified butter (through muslin – or an old tea-strainer) leaving the remaining solids at the bottom of the pan. Reserve the clarified butter for use in stage 8.

2) Add 50g butter to a frying pan and gently cook the garlic and shallot.

3) Add the chicken livers and cook them very slowly (you do not want them to color) for around 5 minutes; you should turn them once; prod them with your finger – they should never get beyond the point where they are soft and yielding.

4) Take the chicken livers out of the pan, put them in a bowl and add the brandy to the pan; turn the heat up a little and make sure all the juices in the pan mix with the brandy.

5) Add the brandy to the livers and the final 50g of butter (you can replace butter with double cream); add a dash of mustard, a grating of allspice, a large pinch of salt and a good couple of twists of pepper.

6) Put everything in a blender and blend very well.

7) Sieve the mixture into a white serving dish (or individual ones are nice).

8) Seal your pâté(s) with the clarified butter.

9) Cover with foil or cling-film, place in the fridge and wait for a couple of days before serving. Eat with bread or toast and some gherkins or other pickles.

Cooking Tips

You can, if you like, replace the butter added at stage 5 with double cream. Also, while I like this with brandy or Madeira, and the dish does need that background kick, you could try another alcohol. I have found many recipes calling for Madeira and others that use port. Experiment and discover which you like best. This recipe is also nice with beef livers, pork livers, duck livers or goose livers, if you prefer them.


Related Post: Learn… How to Cook Beans Fast and Delicious?


Chicken Liver Nutrition: Why Are Chicken Livers Good for Me?


What are the Advantages of Eating Chicken Livers?

Chicken liver pate with cream is low in Sodium. It is also a good source of Thiamin, Zinc, Copper and Manganese, and a very good source of Protein, Vitamin A, Vitamin C, Riboflavin, Niacin, Vitamin B6, Folate, Selenium, Pantothenic Acid, Iron, Phosphorus and Vitamin B12. 

Vitamin B12 is only found in foods of animal origin. The chief role of vitamin B12, also known as cobalamin, is to maintain a healthy central nervous system. Vitamin B12 deficiency can cause nerve degeneration and permanent nerve damage. Vitamin B12 also works with folate to help manufacture red blood cells. Like folic acid deficiency, insufficient vitamin B12 can cause anemia, which is characterized by large, immature and dysfunctional red blood cells.


1) Calories and Protein

Chicken Liver Benefits for Skin. Chicken liver contains high amount of protein which is help to keep hair, skin and nails healthy. The protein of chicken liver make skin, hair and nails get the fantastic condition.

A 100g serving, which is about 3.5 oz., of pan-fried chicken liver contains 172 calories, more than 100 of which come from protein. One serving of chicken liver contains 25.8g of protein, which provides more than 40 percent of the DRI for protein. Chicken liver is a complete protein because it contains all of the essential amino acids, which are those that your body cannot produce. It also contains large amounts of many of these amino acids. According to the World Health Organization’s recommendations for a 175 lb. adult, one serving of chicken liver provides over 100 percent of the minimum daily requirement for phenylalanine. Phenylalanine assists in the production of dopamine and norepinephrine, which are neurotransmitters that affect mood and memory. One serving of chicken liver also provides more than 50 percent of the requirement for all other essential amino acids.


2) Iron and Other Minerals

Although chicken livers may not be the perfect choice for those with heart disease, you may choose to eat them for their high mineral content, especially if you are iron-deficient. One serving of chicken liver provides more than 100 percent of the DRI for men and 72 percent for women. Iron is essential for the formation of hemoglobin, which carries oxygen throughout the body. One serving of chicken liver also supplies 63 percent of the DRI of phosphorus, more than 50 percent of copper, more than 30 percent of zinc and more than 100 percent of selenium.


3) Iron and Zinc

A chicken liver pate provides a healthy dose of iron and zinc. Iron enables your body to use oxygen efficiently and to make new red blood cells. This mineral also plays a role in cell division and the health of your immune system. An iron deficiency can cause fatigue, decreased oxygen and a weakened immune system. Healthy males need 8 milligrams of iron each day and healthy females need 18 milligrams. One chicken liver provides 5.12 milligrams of iron. Zinc plays a role in wound healing, immune system function and cell division. Adult males need 11 milligrams of zinc each day and females need 8 milligrams. One chicken liver contains 1.75 milligrams.


4) Fat and Cholesterol

A diet low in fat, particularly saturated fat, can help you maintain a healthy weight and lower your chances of developing chronic illnesses such as cancer and heart disease. One chicken liver contains 2.86 grams of total fat, with 0.9 grams being saturated. The same chicken liver has 248 milligrams of cholesterol. Healthy adults with normal LDL cholesterol readings should consume less than 300 milligrams of cholesterol each day, the American Heart Association reports. The cholesterol content makes chicken liver only an occasional part of your diet.


5) Vitamins

Chicken livers also supply large amounts of many vitamins. One serving supplies more than 100 percent of the DRI for vitamin A and four of the B vitamins -- folate, pantothenic acid, riboflavin and B12. One serving also provides more than 50 percent of the DRI for choline, vitamin B6 and niacin, which are also water-soluble B vitamins. Vitamin A supports the eyes and immune system. B vitamins assist in the health of the nervous system, liver, brain and muscles.


Get this 30 minute chicken recipe, click, Honeyed Chicken Medieval Recipe- Game of Thrones Food Recipes


What are Chicken Liver Side Effects?

Chicken livers are high in protein and a rich store of folate, which is important for fertility and helps prevent certain birth defects. On the other hand, Boston University School of Medicine advises pregnant women not to eat liver because too much vitamin A can harm your baby. There are reported cases of infants who were fed very large quantities of chicken liver, and who developed raised intracranial pressure because of vitamin A toxicity.


References:

Jacqueline B. Marcus. 2013. Culinary Nutrition: The Science and Practice of Healthy Cooking, first Edition. Academic Press. ISBN-10: 0123918820

Lindsay H Allen (Editor), Andrew Prentice (Editor), Benjamin Caballero (Editor). 2013. Encyclopedia of Human Nutrition, 3rd Edition. Academic Press. ISBN-10: 0123750830

Richard Horsey (Author), Tim Wharton (Author), Tanya Ghosh (Photographer). 2017. Ugly Food: Overlooked and Undercooked. Hurst. ISBN-13: 978-1849046862

Tuesday

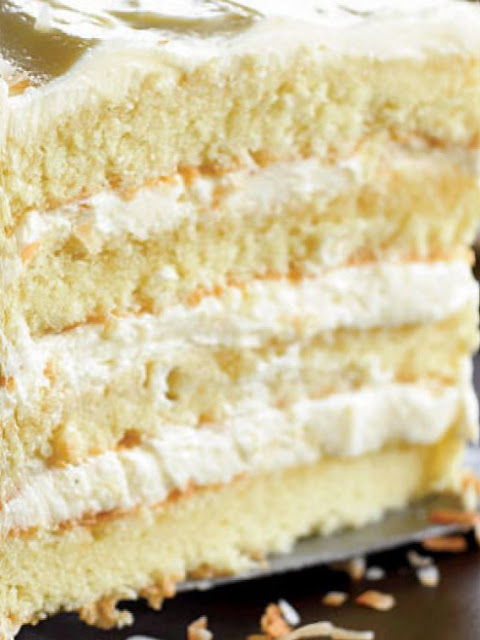
Easy and Moist Southern Coconut Cake Recipe with Coconut Milk by Bobby Flay - Southern Foods Recipes


easy-moist-southern-coconut-cake-recipe-coconut-milk-bobby-flay

Health Benefits of Eating Coconuts

It Can Lower Cholesterol Your Levels: In a study performed by the Food and Nutrition Research Institute, in Bicutan, Taguig, in the Philippines, twenty-one test subjects with moderately elevated blood cholesterol who ate dried coconut flakes daily for fourteen weeks lowered their serum triglycerides and LDL cholesterol levels by up to 6.3 percent.

Reduction of Stroke and Heart Disease Risk: In a study published in the March 1993 issue of the Journal of Internal Medicine, a team of researchers from the Primary Health Care Centre in Sjöbo, Sweden, set out to study incidence of stroke in the coconut-eating population on the island of Kitava in Papua New Guinea. The population, which practices a subsistence lifestyle that is uninfluenced by Western dietary habits, relies on found tubers, fruit, fish, and coconut as dietary staples, with coconut making up the largest portion of the inhabitants’ diets. Of the total population, 1,816 subjects were estimated to be older than three years of age, and 125 were estimated to be sixty to ninety-six years old. The frequencies of spontaneous sudden death, exertion-related chest pain, hemiparesis, aphasia, and sudden imbalance were assessed through semi-structured interviews of 213 adults aged twenty to ninety-six. Resting electrocardiograms (ECGs) were recorded in 119 males and 52 females. No case corresponding to stroke, sudden death, or angina pectoris was described by the interviewed subjects. Stroke and heart disease were absent in this population, even in the older adults. In Western cultures, stroke and heart disease occur in an average of more than 11.3 percent of the overall, adult population.

For Better Cardiovascular Health: Before 1991, coconut was the primary dietary staple in Sri Lanka. The average Sri Lankan ate 132 coconuts per year. Heart attacks and heart disease were rare. In fact, they were so rare that in 1978 the United Nations reported that Sri Lanka had the lowest death rate from ischemic heart disease than any other country in the world. Yet, after an aggressive health campaign in the early 1990s that discouraged coconut-eating (due to a misguided theory that fat in coconut leads to heart disease), coconut consumption dropped to about 90 per person. With the drop in coconut consumption, hospital admission rates for heart attacks increased by about 120 percent for women and137 percent for men.

A study published in the January 2012 issue of Asia Pacific Journal of Clinical Nutrition showed that Filipino women who consumed coconut had healthier blood lipid profiles, a major determinant of heart disease, than those who did not.

Reduction of Parasites and Other Pathogens: The medium chain fatty acids and lauric acid in coconut have long been credited, in coconut-eating cultures, for their impact on reducing parasites and bacterial, fungal, and viral infections. In 2010, researchers from Heinrich Heine University in Düsseldorf, Germany, found that coconut also works to keep sheep parasite-free. 

easy-moist-southern-coconut-cake-recipe-coconut-milk-foods-recipes


"EASY AND MOIST SOUTHERN COCONUT CAKE RECIPE WITH COCONUT MILK" - Southern Foods Recipes


Serve your friends and guests with this delicious coconut cake – a perfect for any special occasion or family desserts. A real treat for those who love great tasting food.


SERVES 8

INGREDIENTS:

Cake
2 tablespoons butter, at room temperature, for the pans
1 cup whole milk, at room temperature
6 large egg whites, at room temperature
1 vanilla bean, split lengthwise, seeds scraped out and reserved
1/2 teaspoon pure vanilla extract
2-1/4 cups cake flour, plus more for the pans
1-3/4 cups granulated sugar
1 tablespoon plus 1 teaspoon baking powder
1 teaspoon fine salt
12 tablespoons (1-1/2 sticks) unsalted butter, cut into 12 pieces, slightly cold


Coconut Filling
3/4 cup Coconut Custard (follow the recipe below), cold
3/4 cup heavy cream, cold


Coconut Butter cream
1-1/2 cups (3 sticks) unsalted butter, at room temperature
1/3 cup confectioners’ sugar
3/4 cup Coconut Custard (follow the recipe below), cold
Pinch of fine salt
Coconut Simple Syrup (follow the recipe below)
2 cups sweetened flaked coconut, lightly toasted


BAKING DIRECTIONS:

1) To make the cake, preheat the oven to 350°F. Butter and flour two 9 × 2-inch round cake pans and line the bottoms with parchment paper.

2) Whisk together the milk, egg whites, vanilla seeds, and vanilla extract in a medium bowl.

3) In the bowl of a mixer fitted with the paddle attachment, mix together the flour, sugar, baking powder, and salt. With the mixer running at low speed, add the butter, one piece at a time, and continue beating until the mixture resembles moist crumbs. Add all but 1/2 cup of the milk mixture and beat on medium speed until pale and fluffy, about 1-1/2 minutes. With the mixer on low speed, add the remaining 1/2 cup milk mixture. Increase the speed to medium and beat for 30 seconds more. Scrape the sides of the bowl and mix for 20 seconds longer. Divide the batter evenly between the cake pans and smooth the tops with a rubber spatula.

4) Bake until a toothpick inserted into the center comes out with a few crumbs attached, 22 to 24 minutes. Cool in the pans on a baking rack for 10 minutes. Then run a small knife around the sides of the pans and invert the cakes onto the baking rack. Remove the parchment paper and let cool completely, about 45 minutes.

5) To make the coconut filling, combine the custard and cream in a bowl and whip until soft peaks form.

6) To make the coconut butter cream, beat the butter and confectioners’ sugar in a stand mixer fitted with the paddle attachment until light and fluffy, about 4 minutes. Add the coconut custard and salt, and beat until smooth.

7) To assemble the cake, use a long serrated knife to slice each cake horizontally into 2 layers. Reserve one of the flat bottom layers for the top of the cake. Place another one of the layers on a cardboard round, cut side up, and brush with some of the coconut simple syrup. Spoon one-third of the coconut filling onto the cake, and using a small offset metal spatula; spread it into an even layer, leaving a ½-inch border around the edge of the cake. Repeat with 2 more layers. Brush the cut side of the reserved cake layer with the remaining syrup. Place the layer, cut side down, on top of the cake. Frost the sides and top of the cake with the butter cream. Pat the toasted coconut onto the sides of the cake and sprinkle some on the top.


Related Post: If you like, nutritious coconut then you will surely love this coconut bread. Get the recipe here; click… Jamie Oliver's Paleo- Grain Free COCONUT BREAD Recipe (Original Gluten-Free Sandwich Bread).


How to Make Southern Coconut Custard


INGREDIENTS:

3/4 cup whole milk
3/4 cup unsweetened coconut milk
1/2 vanilla bean, seeds scraped out, bean and seeds reserved
4 large egg yolks
1/3 cup sugar
3 tablespoons cornstarch
2 teaspoons Malibu coconut rum (you can also use Coconut Rum Liquor Quik Essence)
1/2 teaspoon pure vanilla extract


COOKING DIRECTIONS:

1) Combine the milk, coconut milk, and vanilla bean and seeds in a medium nonreactive saucepan and bring to a simmer over low heat.

2) Whisk the egg yolks, sugar, and cornstarch together in a large bowl. Slowly whisk the warm milk into the egg mixture. Then return the mixture to the pan, set it over medium heat, and bring to a boil. Cook, whisking constantly, until thickened. Scrape the mixture into a bowl, remove the vanilla bean, and whisk in the rum and vanilla extract. Let cool to room temperature; then cover with plastic wrap and refrigerate until cold, at least 2 hours.


Related Post: Have you watched an episode of Game of Thrones? Try Sansa's favorite food, click for the recipe, Sansa Lemon Cakes Medieval Recipe- Game of Thrones Food Recipes.


How to Make Coconut Simple Syrup


INGREDIENTS:

1 tablespoon sugar
3/4 cup sweetened flaked coconut


COOKING DIRECTIONS:

1) Combine 1-1/2 cups water and the sugar in a saucepan, and bring to a boil. Stir in the coconut, remove from the heat, and let sit for at least 30 minutes and up to 4 hours.

2) Strain the liquid into a clean saucepan. Bring to a boil and cook until the mixture is slightly reduced, about 5 minutes. Let it cool.


Related Post: Do not buy those highly processed foods full of artificial additives. Make your own healthy food; it is very easy and fast. Try this one! How to Make Homemade Coconut Mayonnaise - Healthy Coconut Recipes.


References:

This coconut cake recipe was adapted from Bobby Flay’s "Toasted Coconut Cake with Coconut Filling and Coconut Butter Cream" from the famous book:

Bobby Flay, Stephanie Banyas and Miriam Garron. 2010. Bobby Flay's Throwdown!: More Than 100 Recipes from Food Network's Ultimate Cooking Challenge, First Edition edition. Clarkson Potter. ISBN-10: 0307719162

Stephanie Pedersen. 2015. Coconut: The Complete Guide to the World's Most Versatile Superfood (Superfoods for Life). Sterling. ISBN-13: 978-1454913405

Sunday

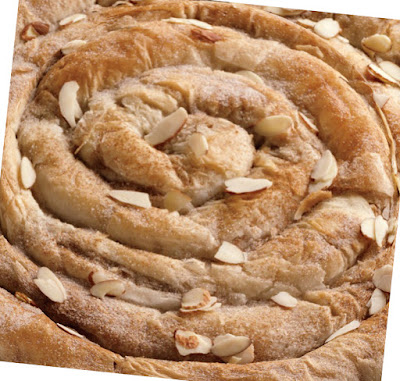
How to Make the Jamie Oliver's Savoury Moroccan Vegan M'Hanncha - Vegetarian Recipes


jamie-oliver-moroccan-vegan-m'hanncha-vegetarian-recipes

This recipe is Jamie Oliver's version of Moroccan M’hanncha, meaning ‘snake’ (snake cake or serpent cake), is an almond paste-filled pastry made with Morocco’s warkha pastry (filo pastry is a good substitute). The pastry is served at celebrations, with guests breaking off pieces from the coil. Serve with mint tea or coffee.

Jamie's version is Savoury style with pearl barley, squash and spices. It is a wonderful way to wrap up gorgeous smashed vegetables and grains to make a beautiful-looking dinner, while also adding amazing texture – crunchy on the outside, soft in the middle.


Serves 8
2 Hours plus cooling

INGREDIENTS:

100g pearl barley
1 butternut squash (1.2kg)
2 red onions
2 cloves of garlic
2 red peppers
1 big bunch of coriander (60g)
olive oil
1/2 teaspoon dried red chili flakes
1 heaped teaspoon fennel seeds
1 heaped teaspoon cumin seeds
1 teaspoon ground coriander
100g mixed dates and dried apricots
1/2 a lemon
10 sheets of filo pastry (Sometimes called phylo (phyllo) leaves or warqa leaves which you can buy ready-made at local shops or from Amazon.com for extra convenience) You can substitute this using strudel leaves or Chinese spring roll wrappers but filo leaves is a lot thicker. Two common sizes of phyllo sheets are 12 by 17 in/30.5 by 43 cm and 9 by 14 in/23 by 35.5 cm.

1 tablespoon shelled pistachios
icing sugar, for dusting


COOKING DIRECTIONS:

1) Cook the pearl barley according to the packet instructions, then drain.

2) Wash the squash, then carefully cut it in half lengthways and remove the seeds.

3) Peel the onions and garlic, and deseed the peppers.

4) Chop the squash, onions and peppers into 1cm dice. Finely chop the garlic with the coriander stalks (reserving the leaves). Place it all in a pan on a medium-low heat with 2 tablespoons of oil, the chili flakes, fennel and cumin seeds, and the ground coriander.

5) Sweat with a lid on for 25 to 30 minutes, or until soft but not colored, stirring occasionally.

6) Remove the stone or seed of the dates and finely chop the flesh with the apricots and coriander leaves. Fold into the vegetable pan with the drained pearl barley, squeeze in the lemon juice, season to perfection, then leave to cool.

7) Preheat the oven to 180ºC/350ºF/gas 4.

8) Lay out two clean damp tea towels on a large work surface, side-by-side, with the longest edges facing you. Working quickly but taking care, lay out 3 sheets of filo side-by-side with the short edges towards you, overlapping each one by 2- 1/2 cm and brushing between the overlaps with water.

9) Lightly brush the sheets with oil, place 3 filo sheets directly on top, then repeat with another 3 sheets.

10) Save the remaining sheet for patching up.

11) As evenly as possible, spoon your filling in a line along the long edge closest to you. Brush the opposite long edge with a little oil. Now, I would recommend finding a friend to help you roll it up if you cannot do it alone.

12) Working slowly and carefully, use the tea towels to help you roll it up and away from you into a giant cigar, keeping it on the damp tea towel at all times. Roll it into a large pinwheel, working quickly but handling it gently to avoid too many cracks.

13) Gently slide it into a large greased baking tray, and patch up any gaps, if needed.

14) Brush all over with more oil and bake for 45 to 50 minutes, or until gorgeous, crisp and golden.

15) Ten minutes before the end, smash and sprinkle over the pistachios and an extra pinch of each of the spices, if you like.

16) Serve with a super-light dusting of icing sugar. Delicious with all the usual trimmings or served with a Spiced tomato sauce (please refer to the recipe below).


Filo Pastry (Phyllo Pastry) Buyer's Guide

This thin pastry of the Eastern Mediterranean is not Moroccan, but it is the most easily available substitute outside Morocco for warkha pastry. Measurements have been given in the recipes regarding sheet sizes, which will serve as a guide for the size available in your area. However, most important is how it is handled. Thaw as directed on the package if frozen. Whether it is frozen or chilled, it must be left in its package at room temperature for 2 hours before use. Place the sheets flat on the work surface, and keep them covered with dry, folded cloths or plastic sheeting; never put damp cloths in contact with the pastry. Keep the kitchen cool
and draught-free.

Filo pastry is sold at Amazon.com on ready-made in rolled layers, fresh from the chiller cabinet, or frozen. Click here to get one, Athens Foods Fillo Dough Sheet. The one is a lot cheaper… filo pastry.

You have to work quickly with filo pastry otherwise it dries out – it’s best to keep it in the plastic wrapping or cover it with a damp cloth while you’re working with it. The layers are usually brushed with melted butter or oil to help them brown. Filo pastry can be fried or oven-baked and cooks very quickly. It is used to make a wide variety of sweet and savory dishes, such as Greek Spanakopita (spinach and cheese triangles) or decadent baklava (honey and nut pastries).

If you want to make your own Filo Pastry Leaves, follow the recipe below:


How to Easily Make Homemade Authentic Warka Pastry Leaves

Warqa (or Ouarka, warkha)

Warqa (or Ouarka, warkha) is a union of Berber cooking and Arab influences drawn from its Persian heritage. Via the Silk Road, the Persians had learned the art of making thin pastry from the Chinese.

Moroccan warqa (called malsouqa in Tunisia and dioul in Algeria) is made precisely the same way as Chinese spring roll skins. In Canton, this type of pastry is called chun gun: it should not be confused with the thicker egg roll skin. Though many people confuse this type of pastry with Greek phyllo dough and Hungarian strudel leaves (both of which, by the way, will make an adequate m'hanncha) the warqa- spring roll skin type is found only in China and North Africa.

The fine, paper-thin pastry sheets used for savory stuffed pastries and layered desserts are made by smearing a fine coating of damp, sticky, elastic dough across a wide, hot griddle before peeling it off after 15 seconds or so in a single, fluid motion. Warqa is tricky to make, and most Moroccans buy fresh sheets in the market or commercial brands in stores.

The technique used in this recipe requires a lot of patience and dexterity. Filo pastry is a very good substitute and is well worth the time and effort saved.


INGREDIENTS:

4 cups (600 g) flour Pinch of salt
1 tablespoon olive oil
2 cups (500 ml) lukewarm water
Makes approximately 10 sheets
Preparation time: 1 hour + 1 hour for dough to rest


COOKING DIRECTIONS:

1) Mix the flour, salt, and oil together in a bowl. Gradually add the water, kneading into a soft, elastic dough. Sprinkle with a little more water, cover and set aside to rest for 1 hour.

2) Set a skillet (preferably copper skillet) on top of a pot of water, with the under-side facing up. Bring the water to a simmer over medium heat and grease the upturned skillet. When the metal is hot, reduce the heat to low. Take a handful of dough and quickly touch the lump of dough to the skillet. It will leave a thin round film on the pan. Repeat several times, leaving no gaps between each film, forming a large, almost transparent sheet.

3) Remove the sheet carefully and keep under a damp cloth until ready to use. Repeat with the remaining dough, greasing the upturned skillet before making a new pastry sheet.


Are you into healthy living or paleo diet? Spare a few minutes and check the best vegetarian cookbooks (Book Award Winners- James Beard). Please click here NOW… Best Vegetarian Diet Cookbooks of All Time- 2017.


How to Make Homemade Spiced Tomato Sauce Easily


INGREDIENTS:

3 fresh red chilies
1 stick of cinnamon
2 cloves of garlic
1/2 a bunch of fresh thyme (15g)
2 large peeled roasted red peppers
2 x 400g tins of plum tomatoes
1 tablespoon balsamic vinegar


COOKING DIRECTIONS:

1) On the hob, heat 1 tablespoon of oil in a roasting tray on a medium heat. Leaving them joined at the stalk, halve the chilies lengthways, then add to the tray with the cinnamon for 5 minutes, stirring regularly.

2) Meanwhile, peel and slice the garlic.

3) Scoop the chilies and cinnamon out of the tray and put aside, then add the garlic, strip in most of the thyme leaves and cook for 5 minutes.

4) Drain, chop and add the peppers, pour in the tinned tomatoes and 1 tin’s worth of water, breaking up the tomatoes with a wooden spoon, then add the balsamic and a pinch of salt. Bring to the boil, and then simmer for 20 minutes, or until thickened and reduced, stirring occasionally.


Related Post: Try another Jamie Oliver's favorite recipe, get it here… How to Make the Perfect Jamie Oliver's Lancashire Hotpot- Lamb Recipes


References:


Fatema Hal, Jean-Francois Hamon, Bruno Barbey. 2007. Authentic Recipes from Morocco-(Authentic Recipes Series). Periplus Editions (HK) ltd. ISBN-10: 9780794603250. ASIN: 0794603254

Jamie Oliver. 2016. Jamie Oliver's Christmas Cookbook. Michael Joseph (1836). ISBN-13: 978-0718183653

Paula Wolfert. 1987. Couscous and Other Good Food from Morocco. Ecco Books ISBN-10: 0060913967


If you own you like healthy recipe and soups, you need to learn this… 10 Best Tips for Freezing Soup: How to Freeze Individual Portions of Soup in Mason Jars (Glass), Plastic Containers, Ziploc Bags and Tupperware


Watch Related Videos:

1) Warka (Brick Pastry) Recipe- How to Easily Make Homemade Authentic Warka Pastry Leaf


2) M'Hanncha - Moroccan Almond Pastry Recipe - CookingWithAlia - Episode 72

Saturday

How to Cook Beans Fast and Delicious?


how-to-cook-beans-fast

Key Points:

a) Brining
b) Cooking with salt
c) pH level

One factor that affects the cooking rate of beans is the pH level. Acidic environments tend to cause beans to seize up—which is why, for example, Boston baked beans, cooked in acidic molasses and tomato, can take as long as overnight to soften properly. Brining the beans in saltwater mitigates this effect to some degree, but the only way to be sure that your beans will cook properly in acidic stews (like, say, chili) is to soften them separately and add them to the pot later on.

What Happens if You Do not Soak Beans Before Cooking?

It will take too long to cook. When boiled the beans will burst into smaller pieces with hard or tough bean skin. I will result into a mushy and starchy mixture.


Related Blog Post: Are you into authentic paleo diet or healthy lifestyle? Spare a few minutes and get more information about the best vegetarian cookbooks available (James Beard Award Winners). Please click here NOW… Best Vegetarian Diet Cookbooks of All Time- 2017.


Why You Should BRINE the Beans and Not Just Soak Them?

Dried beans defy most of the rules of cooking. For something so small, they sure do require a lot of cooking. While the active work is minimal, it can be frustrating when a considerable investment of time yields subpar results. You want beans to be creamy, with soft skins. However, often the skins are still tough despite hours of cooking. Worse, the beans have exploded and formed a starchy mass. What to do? Professional chefs recommend (1) brining the beans ahead of time, and then (2) cooking them with salt, or a salty ingredient such as chicken broth, pancetta, or Parmesan if you prefer it.

How to brine beans? Dissolve 3 tablespoons salt in 4 quarts cold water in large bowl or container. Add dried beans and soak at room temperature for at least 8 hours or up to 24 hours. Drain and rinse well.

The Science behind Brining Beans

Beans with tough skins have a tendency to burst in the process of cooking, spilling their starchy innards into the pot and finishing with a sticky, unappealing texture.

Salting beans can help quickly tenderize their skins, preventing blowouts or bursting while cooking, which is the key to beans that cook up creamy rather than starchy.

Magnesium and calcium, two ions found in bean skins that act kind of like buttresses, supporting the skins’ cell structure and keeping them firm. Because calcium and magnesium ions form links between pectin molecules, they are responsible for creating strong cells that are tightly bound together. During soaking, the sodium ions will filter only partway into the beans, so their greatest effect is on the cells in the outermost part of the beans.

If you soak beans in salted water overnight, the sodium ions will react with the calcium and magnesium, leaving you with skins that soften at the same rate as the beans’ interiors.

If you really want speed, the most efficient and effective to cook beans fast and easy is by using an electric pressure cooker. Food preparation for your family has never been this easy. Check the best electric pressure cooker on the market today rated highly by thousands of satisfied customers. Click the link here now… 8 Best Electric Pressure Cooker.

Bookmark it! Share it with your friends they might not know it yet. Please share and look cool! :-)


References:


J. Kenji López-Alt. 2015. The Food Lab: Better Home Cooking Through Science. W. W. Norton & Company. ISBN-13: 978-0393081084

The Editors of America's Test Kitchen and Guy Crosby Ph.D. 2012. The Science of Good Cooking (Cook's Illustrated Cookbooks), First Edition. Cook's Illustrated. ISBN-13: 978-1933615981


Related Cooking Video: Best Method for Cooking Dried Beans

Friday

The Complete Electric Pressure Cooker Buying Guide: How to Choose the Right Pressure Cooker?


electric-pressure-cooker-buying-guide-how-choose

When buying an electric pressure cooker consider the following factors first:

1) What is the Optimum Size for Your Need? Though 6-quart cookers (Instant Pot 6-quart) are very popular on Amazon.com, it is highly recommended purchasing an 8-quart (Instant Pot 8-quart) because you can always make less food in a bigger pot, but not the other way around. Recipes that serve four is usually not a problem in either size cooker, but when you get to those recipes that involve larger yields, or you want to cook a pound of beans, the recipe simply won’t fit in a 6-quart.

2) Consider Breadth and Thickness of the Disk on the Pot’s Bottom. Based on experience, I found that stovetop or regular pressure-cooker pots with a thicker, wider disk retain heat better than those with thinner disks. They rapidly reached pressure and allowed for steady, hands-off cooking. Those with thinner, narrower bases can force you to adjust the heat up and down like a yo-yo to maintain pressure.

3) Is it Easy to Use Even for Your Grandmother? Different brands have different ease of use. Some lids lock automatically when the handles are lined up, while others require another step of sliding a switch to manually lock the pot. Some pressure indicators are deep in a hole, making you lean over the cooker to see them; others are confusing to interpret. The best models had pressure indicators that were brightly colored, prominently raised, and easy to read at a glance from several feet away.

4) What is the Maximum Temperature Reached? Temperature is directly correlated to pressure. High pressure is considered to be 15 psi, which is reached when water in the cooker is boiling at 250 degrees. Some cookers never achieved that temperature, and the food was not fully cooked.

5) Evaporation Loss is also Critical. As a pressure cooker heats up, valves in the lid generally release a small amount of steam until they come to pressure, at which point the pressure indicator rises and should cut off the release of steam. 

Some of the electric pressure cookers I have experienced using at home and professionally at work, continued venting steam throughout cooking process, even if I made sure the pots were not over pressurized. Losing steam rapidly means you are losing some flavor. For recipes that need a lesser amount of liquid in relation to the cooking time, higher evaporation rates or rapid venting of steam can translate to drying and scorching. Most recipes call for sufficient quantities of liquid so this should not be a problem. However, if you have a cooker with a poor rating for evaporation loss, or if you own a pot that releases a fair amount of steam, this will greatly affect your cooking outcome. 

Electric pressure cookers can also switch to the keep-warm mode when there is not enough liquid, a problem when cooking whole chicken. You might consider adding a little extra liquid to the pot every time.

6) What is the Height of Pot’s Sides and Size of Cooking Surface? A low and wide electric pressure cooker proved better since they provide a large cooking surface, making browning food (Maillard Reaction) efficiently and effectively before the lid is put on the pot. Wide inner pots also allow for browning meat in fewer batches (not crowded according to Julia Child), and this shape easier to see and reach into. Straight-sided pots were also easier to clean compared to others.


Now that you know how to choose the best electric pressure cooker, it is time to choose from the 10 most affordable and highly recommended electric pressure on sale. Get more information, please click here now, Affordable and Best Electric Pressure Cookers - Top 10 Brands in USA, UK, Canada, Australia, India and Amazon Reviews 2017- 2018.

Thursday

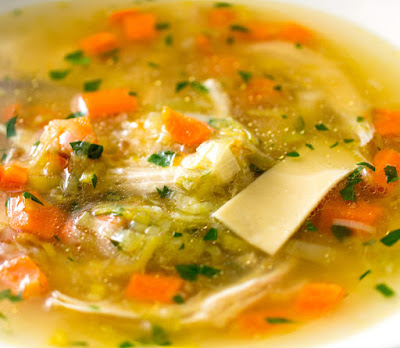
10 Best Tips for Freezing Soup: How to Freeze Individual Portions of Soup in Mason Jars (Glass), Plastic Containers, Ziploc Bags and Tupperware


Quickly learn how to freeze soup so you can always have a delicious and hearty meal ready to go. Many soups freeze easily, so they are great healthful instant meals for busy days and nights. Follow these quick and easy tips for best results.

tips-freezing-soup-mason-jars-plastic-ziploc-tupperware

1) You can freeze soups in large batch or in smaller amounts, portion-size containers that are ready to heat and serve. The smaller the container, the quicker it will freeze and defrost. No more freezing big batches of soup when all you need is one serving at a time.

2) Before freezing, cover, label, and date your soup. As a rule, stocks and broths can be frozen for up to 6 months; vegetable soups, about 4 months; meat, fish, or chicken soups, about 3 months; and soups with egg, milk and cream, about 2 months.

3) How to freeze soup in mason jars? You should use wide mouthed canning jars that come in pint and half pint sizes. Anytime you freeze in a glass jar that has shoulders, you have to make sure that the broth stays below the shoulders while it freezes and expands. This will prevent glass cracking in the freezer.

4) If possible, never use jars with shoulders–these jars will break due to the expansion that happens when food is frozen. Use Ball Mason Pint Jars are marked with a freeze fill line that is about an inch below the rim.

5) Place your jars in a Jar Box before putting in the freezer. This allows you to keep some distance between them and can be handy if you use it in a chest freezer. These jar boxes are awesome!

6) Can I use Tupperware in the freezer? Definitely YES! Certain foods, such as liquids, casseroles and uncooked meat, can be frozen in Tupperware containers. According to Tupperware Brands Corporation (NYSE: TUP), the only foods the company does not recommend freezing are uncooked eggs, canned food, salads, mayonnaise and creamy sauces.

7) You can also freeze soup in other plastic containers, leaving about 1/2 inch at the top to allow for expansion. Alternatively, fill plastic freezer bags (Ziploc Bags) about three-quarters full and squeeze out as much air as possible. Please do not freeze soup in containers that are not specifically marked food-safe or freezer-safe.

8) Chill soup thoroughly before freezing; this allows it to freeze faster. The ice crystals that form will be smaller, so your soup will have better texture and flavor.


Somewhat Related Post: If you want great tasting and healthful food. Then try this quick and easy recipes: Manhattan Clam Chowder Recipe of 3 Michelin Starred Chef Daniel Humm and How to Make the Perfect Jamie Oliver's Lancashire Hotpot- Lamb Recipes


9) Keep a thermometer in the freezer to make sure the temperature remains constant at 0°F. If you are freezing a large quantity at once, turn the thermostat to its coldest setting until the soup freezes.

10) Can you freeze soup with cream in it? Be aware that soups containing cream, wine, or lemon juice (or those thickened with eggs or flour) does not always freeze well.

If you are making a cream-based soup, pour off most of the liquid, and freeze the solid portion of the soup. When you reheat, add fresh cream or milk. When reheating, simmer gently and whisk constantly to prevent curdling.


Adding more speedy tips…

11) Can you freeze soup that has milk in it? Milk-based soups can be frozen safely for two months. While some soups may separate slightly, this can typically be fixed by whisking in a little additional milk or cream or by stabilizing the cream by mixing in arrowroot powder and water slurry.

12) How do you thaw or reheat frozen soup? If you want to defrost a frozen soup, leave the soup in its container and defrost in the refrigerator, microwave oven, or under running tap water. You can also remove it from the container and reheat the frozen soup in a saucepan over low heat. A microwave oven is better for reheating small amounts of soup. Very easy! Just remember that refreezing after thawing is not recommended with some defrosting method.

13) Don’t be alarmed if puréed soup separates after defrosting. To fix it, just whisk it back together.

14) Serve soup as soon as possible after defrosting.


If you like delicious and easy to cook soup for all seasons and occasions, get more information here, New England Soup Factory Cookbook.


VIDEO - The Best Way to Freeze Food Longer Shelf Life and Rapid Defrosting

Disclosure | Disclaimer |Comments Policy |Terms of Use | Privacy Policy| Blog Sitemap


The information contained herein is provided as a public service with the understanding that this site makes no warranties, either expressed or implied, concerning the accuracy, completeness, reliability, or suitability of the information. Nor does warrant that the use of this information is free of any claims of copyright infringement. This site do not endorse any commercial providers or their products.


Culinary Physics Blog: Exceptional food that worth a special journey. Distinctive dishes are precisely prepared, using fresh ingredients. And all other foods that can kill you. Culinary Physics is a Molecular Gastronomy blog specializing in molecular gastronomy recipes-food style, molecular book review, molecular gastronomy kit review and molecular gastronomy restaurants guide.


Culinary Physics Blog is your comprehensive source of Australian cuisine recipes, Austrian cuisine recipes, Brazilian cuisine recipes, Caribbean cuisine recipes, Chinese cuisine recipes, Cuban cuisine recipes, East African cuisine recipes, English cuisine recipes, French cuisine recipes, German cuisine recipes, Greek cuisine recipes, Hungarian cuisine recipes, Indian cuisine recipes, Indonesian cuisine recipes, Israeli cuisine recipes, Italian cuisine recipes, Japanese cuisine recipes, Korean cuisine recipes, Lebanese cuisine recipes, Mexican cuisine recipes, North African cuisine recipes, Norwegian cuisine recipes, Philippine cuisine recipes, Polish cuisine recipes, Russian cuisine recipes, South American cuisine recipes, Spanish cuisine recipes, Thai cuisine recipes, Turkish cuisine recipes, Vietnamese cuisine recipes and West African cuisine recipes.


2011- 2022 All Rights Reserved. Culinary Physics Blog

http://culinaryphysics.blogspot.com